So you’re convinced that Squarespace is the platform for you.
It’s simple user interface, beautiful templates, and all-in-one platform won you over, and you’re ready to make the switch.
But where do you start? How do you move all your of your current content over, transfer your domain, and easily make the switch to Squarespace?
Here are 6 simple steps for making the transition as easy as possible.

1 | Take Squarespace for a test drive
Squarespace offers a free 14-day trial, so take advantage of it before spending money on a paid plan.
Choose your template, layout the pages of your site, and customize the design.

These Elle & Company posts will walk you through exactly how to do it:
- A Step-By-Step Guide for Choosing the Right Squarespace Template
- Setting Up Pages & Navigation in Squarespace
- Using Squarespace Blocks
- The Many Uses of the Squarespace Summary Block
- Using the Style Editor to Customize Your Squarespace Site
- 6 Ways to Brand Your Squarespace Website
- 5 Easy Ways to Customize Your Squarespace Website
- Blogging with Squarespace
- How to Set Up Blog Archives in Squarespace
Go ahead and get everything set up the way you want it, with the exception of products and blog posts (I’ll show you how to easily transfer those over in step 3).
2 | Choose your plan
Now that the layout and design of your trial site is ready to go, it’s time to make things official and upgrade to a paid plan.
Squarespace has a few different options, all laid out in detail on their site here.

If you’re looking for a simple website with less than 20 pages, the Personal plan is a great option.
- $12 per month if you pay annually or $16 month to month
- Unlimited bandwidth and storage
- Free domain for those paying annually (no worries if you already have a domain - you can easily transfer it over in step 5)
- Up to 20 pages and galleries
If you’re looking for a website with unlimited pages and no e-commerce features, the Business plan is the way to go (that’s the plan I use for this site).
- $18 per month if you pay annually or $26 month to month
- Unlimited bandwidth and storage
- Free domain for those paying annually
- Unlimited pages and galleries
- Professional email address (ex. yourname@yourbusiness.com)
And if you’re looking for an e-commerce website, the Basic option (under the Online Store tab) is what you need.
- $26 per month if you pay annually or $30 month to month
- Squarespace website with integrated galleries and blogs
- Unlimited products, pages, bandwidth, and storage
- Free domain for those paying annually
- Professional email address
After you’ve browsed the options and settled on the right plan, click Upgrade Now in the banner at the bottom of your Squarespace window, select the plan, and walk through the steps to purchase.
3 | Transfer your content
What about the content that’s already on your current site?
Do you have to copy and paste all of your blog posts into Squarespace? Do you have to manually enter each and every product to your new shop?
Thankfully, no! It’s much easier than that.
Squarespace allows you to easily import blog posts and products, which makes site transfers a breeze.
If you have blog content to import, Squarespace will pull in post content, comments, and images. It also tries to preserve your existing post URLs.
You can find step-by-step instructions for importing content in these Squarespace Help articles:
If you have a shop, you can import as many products as your plan allows.
These Squarespace Help articles walk you through how to import products to Squarespace:
4 | Set up a temporary cover page
At this point you’ve chosen a template, set up your pages and navigation, and customized the design. You selected a pricing plan and imported existing blog posts and products.
Your site should be ready to go.
All that’s left to do is officially make the switch by transferring your domain.
But before you transfer your domain and reveal your new Squarespace site to the world, consider setting up a temporary cover page.
This cover page will act as a temporary landing page when people try to access your website’s URL.
Domain transfers can take anywhere from 10 minutes to 10 hours, so this cover page will allow you to choose when your new site will officially go live.
Check out this step-by-step Squarespace Help article on how to set it up.
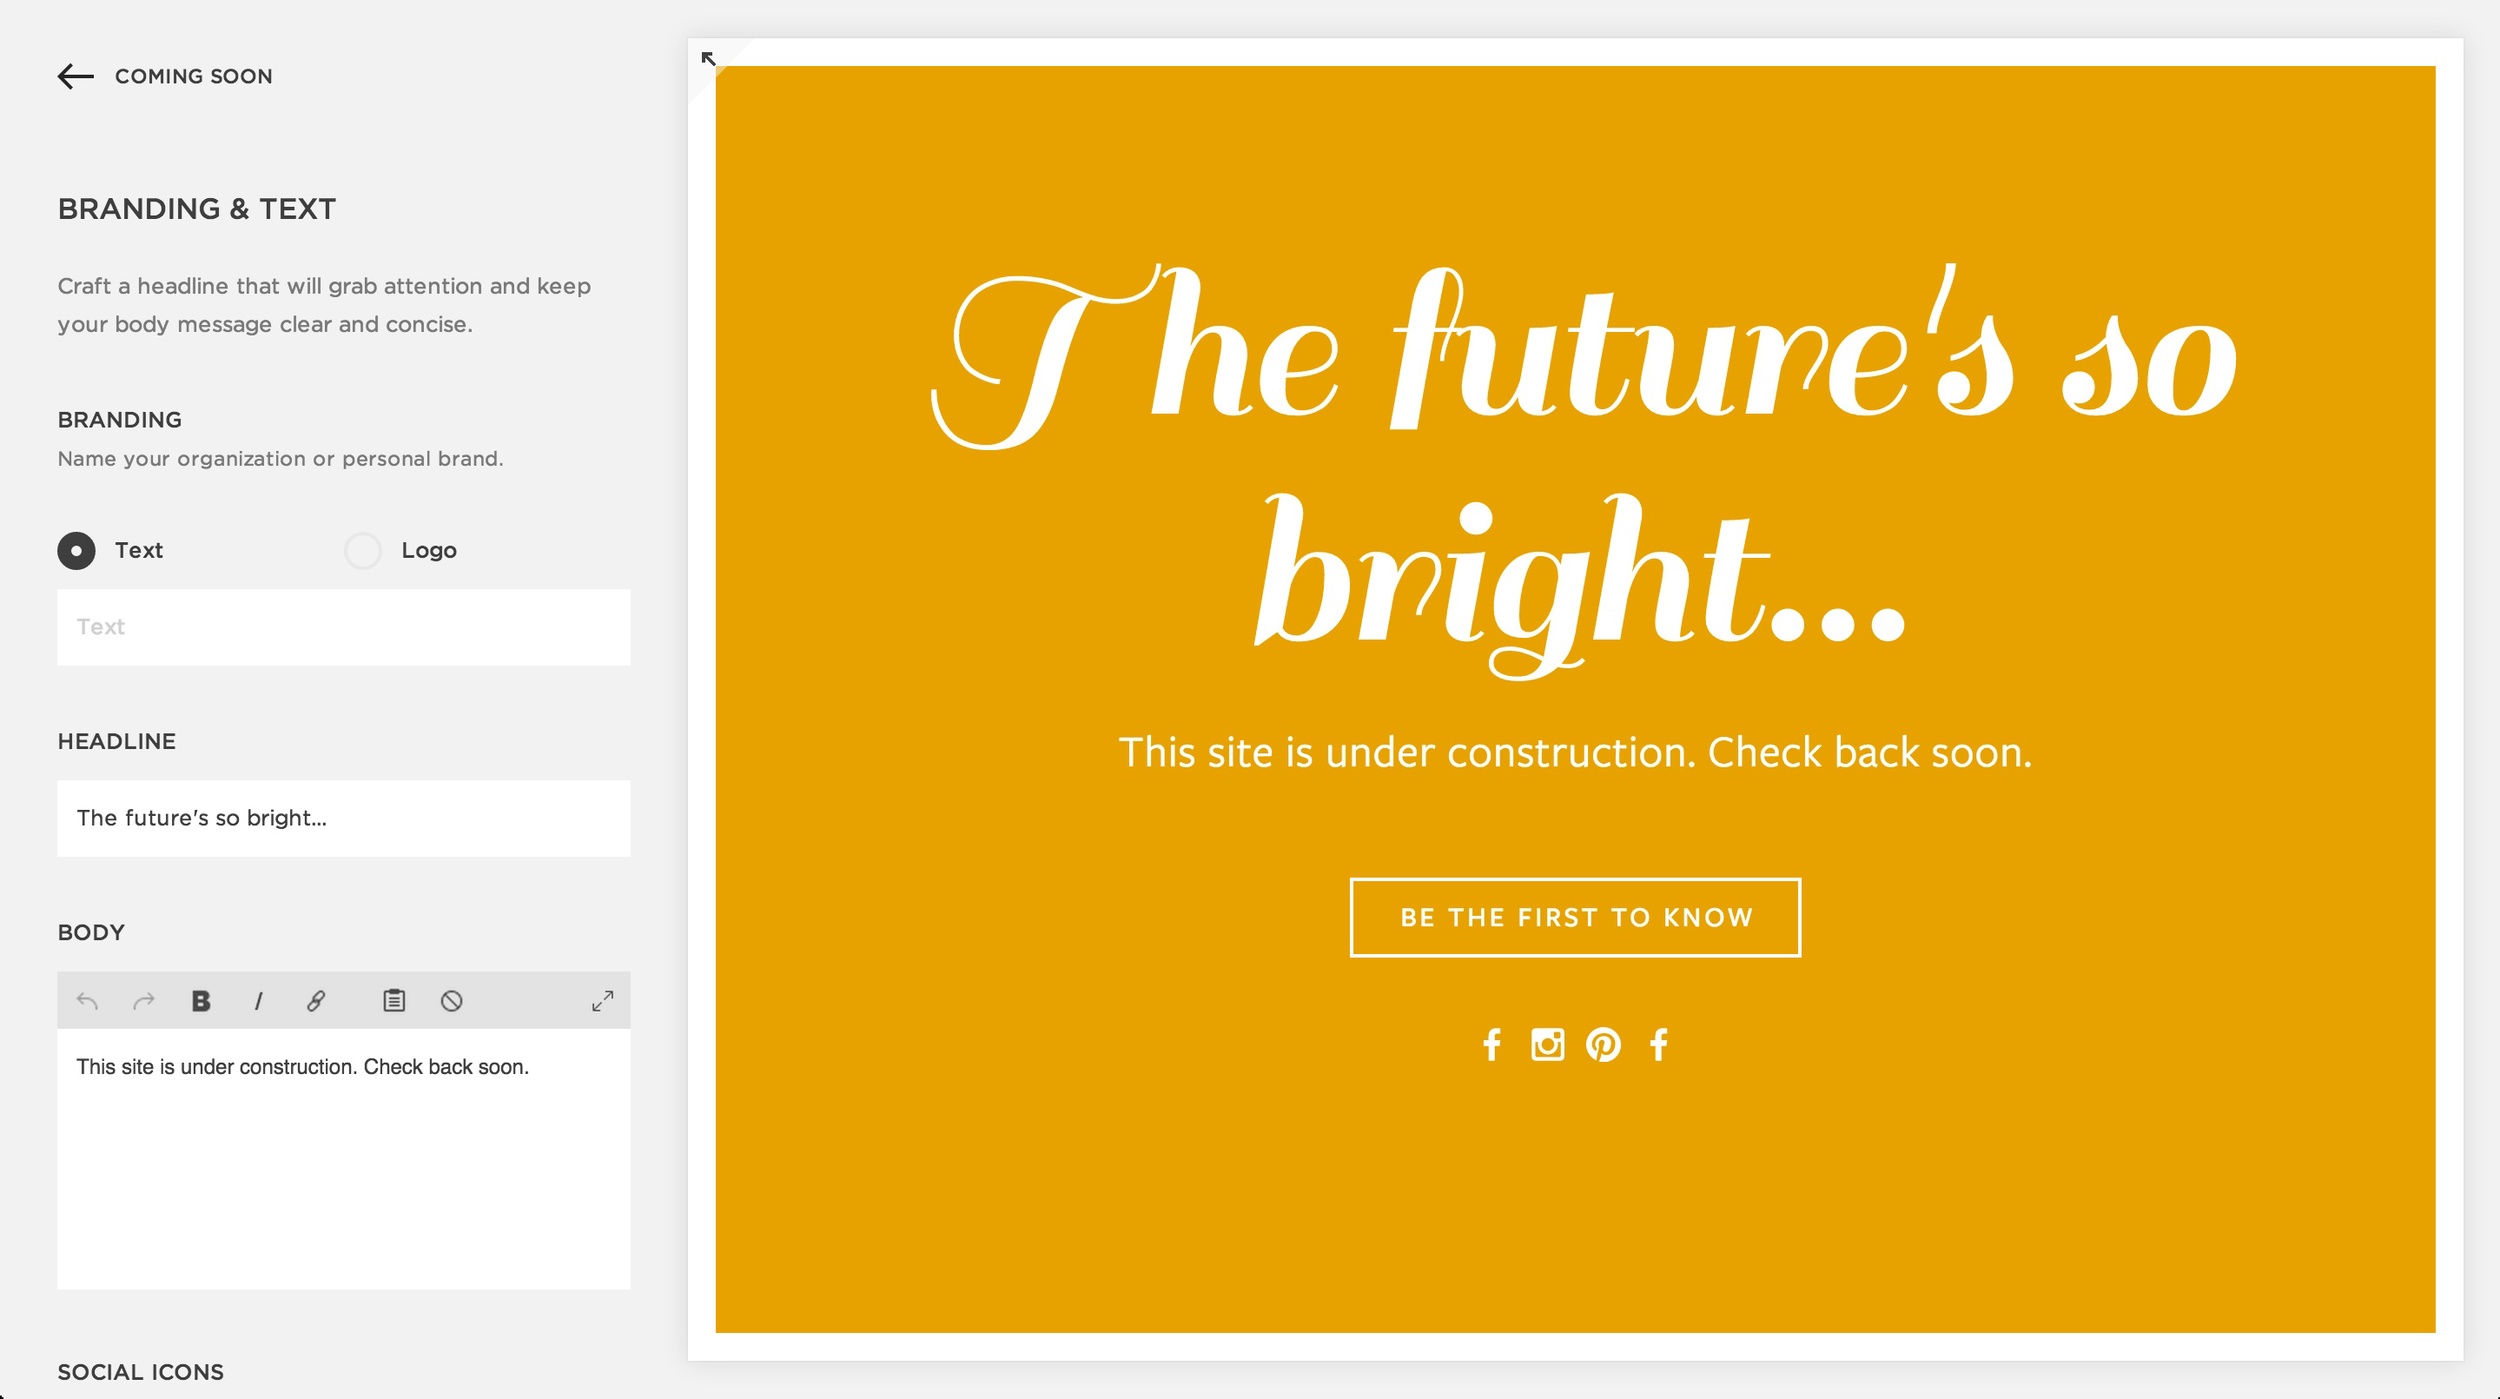
These cover pages can also be a great way to build suspense and excitement among your audience.
Be sure to include your contact information (just in case someone needs to reach you in the meantime), social media links, your new site’s launch date/time so people know when to return, and even an opt-in for people to be notified when the new site goes live.
5 | Transfer your domain
A custom domain is included in any Squarespace annual subscription plan.
But for those of you who already have a domain through a third-party provider, Squarespace makes the transfer process fairly easy.
This Squarespace Help article walks you through preparation and timing, and even shares provider-specific guides for how to transfer your domain from GoDaddy, Bluehost, Google, and more.
6 | Launch your new site
Once your domain has officially been transferred and you’ve triple-checked all the links and content on your new Squarespace site, it’s time to remove the cover page and share it with the world.
Oh, and celebrate. Be sure to do that, too.
Like most things with this website platform, Squarespace makes the switch easy.
Have you made the switch to Squarespace? How did it go?