"I fall behind on my blog posts all the time, I'd love to learn how to streamline blogging and keep on top of it!"
"How to write more content. I hate writing and I'm not good at it, so I avoid it even though I KNOW content is what will help me succeed."
"More on the practicalities of blogging. Choosing images for posts."
I recently conducted my annual reader survey. These were some of the responses I received to the question “What would you like to learn more about from Elle & Company?”
I was surprised to learn that many of you want to learn about my blogging process and how I am able to consistently blog. Many of you recognize the importance of blogging, but identified it as a struggle (which I totally empathize with).
Blogging isn’t quite so difficult if you have a clear-cut process. So today I’m sharing a behind-the-scenes look at my blogging process.

Step 1 | Brainstorm
While there's no right or wrong way to blog, great content is the key to blogging success. But share-worthy content isn't always easy to come up with or create, is it?
There are 8 ways we brainstorm blog post ideas around Elle & Company. You, too, can use them to provide your readers with quality content and keep them coming back for more.
- Frequently asked questions in my inbox. This is a foolproof strategy for brainstorming blog post content. Your audience is already emailing you to ask these questions, so turn your most frequently asked questions into a blog post. Not only will this streamline your email responses because you can just shoot them the link to the blog post instead of typing out your response every time someone asks, but I can almost guarantee that for everyone 1 person who emailed you to ask that question, at least 10 other people were wondering the same thing!
- Facebook community. I recently created an Elle & Company Facebook community and people are constantly dropping their general business/blogging/design questions into that group. If you don’t have a Facebook group of your own, try to find another Facebook group that has members who align with your audience and take a look at common questions people are asking. FAQs make the best blog post ideas.
- Ellechat questions. I host a live weekly webinar series for creative entrepreneurs called Ellechats. I typically leave about 15 minutes at the end of each webinar to answer questions on the topic we are exploring, but sometimes I don’t always get to all the questions. Instead of just leaving them unanswered, I often go back through them and turn them into new blog posts! Similar to the Facebook community, if you don’t host any webinars, try to find webinars in your field whose audience aligns with yours and see what common questions they are asking there.
- Blog post comments. If you’re already blogging, you might have a few blog post comments on older posts that you can look through and see if any past comments/questions could be turned into other blog posts.
- 50 No Fluff, Content Rich Blog Post Ideas. Now it’s getting a little meta, but I have a blog post on 50 blog post ideas.
- 50 More No Fluff, Content Rich Blog Post Ideas. And I wrote another one. Check out these posts for 100 blog post ideas!
- Brainstorm exercise. When I first started blogging more seriously a few years ago, Jake and I would set a timer for 30 minutes and write down every blog post idea that came to mind. A good number of the ideas were duds that never made it on the blog, but the point of the exercise was just to get the creative gears turning. I would walk away with at least 10 solid ideas each time. I highly recommend trying this out, so I wrote a blog post on How to Come Up With 60 Original Blog Post Ideas in 30 Minutes that includes our brainstorm exercise and a free printable to collect your ideas.
- Reader survey. You’re reading this blog post right now because of some feedback we received on our 2017 reader survey. You might consider putting together a reader survey which is sure to give you blog post ideas for weeks!
Quick tip: Consider creating a space in your project management system to store blog post ideas so you don’t lose them. We set up a task in Asana to store all of our ideas as they come to mind. The whole team has access to them, and having them all in one place makes it easy to pull them straight into our Content Queue.

Step 2 | Add blog post ideas to the Content Queue
To keep track of all of our content (blog posts, newsletters, Library additions, etc.), we created a “Content Queue” board in Asana with lists for each day of the week.

Because I aim to blog every Monday, Wednesday, and Friday, I pull 3 blog post ideas into the Content Queue from my brainstorm list, add each one to the proper list, and assign each one a due date (typically the date that the post will be published).
I try to do this at least a couple weeks in advance to help me prepare ahead of time.

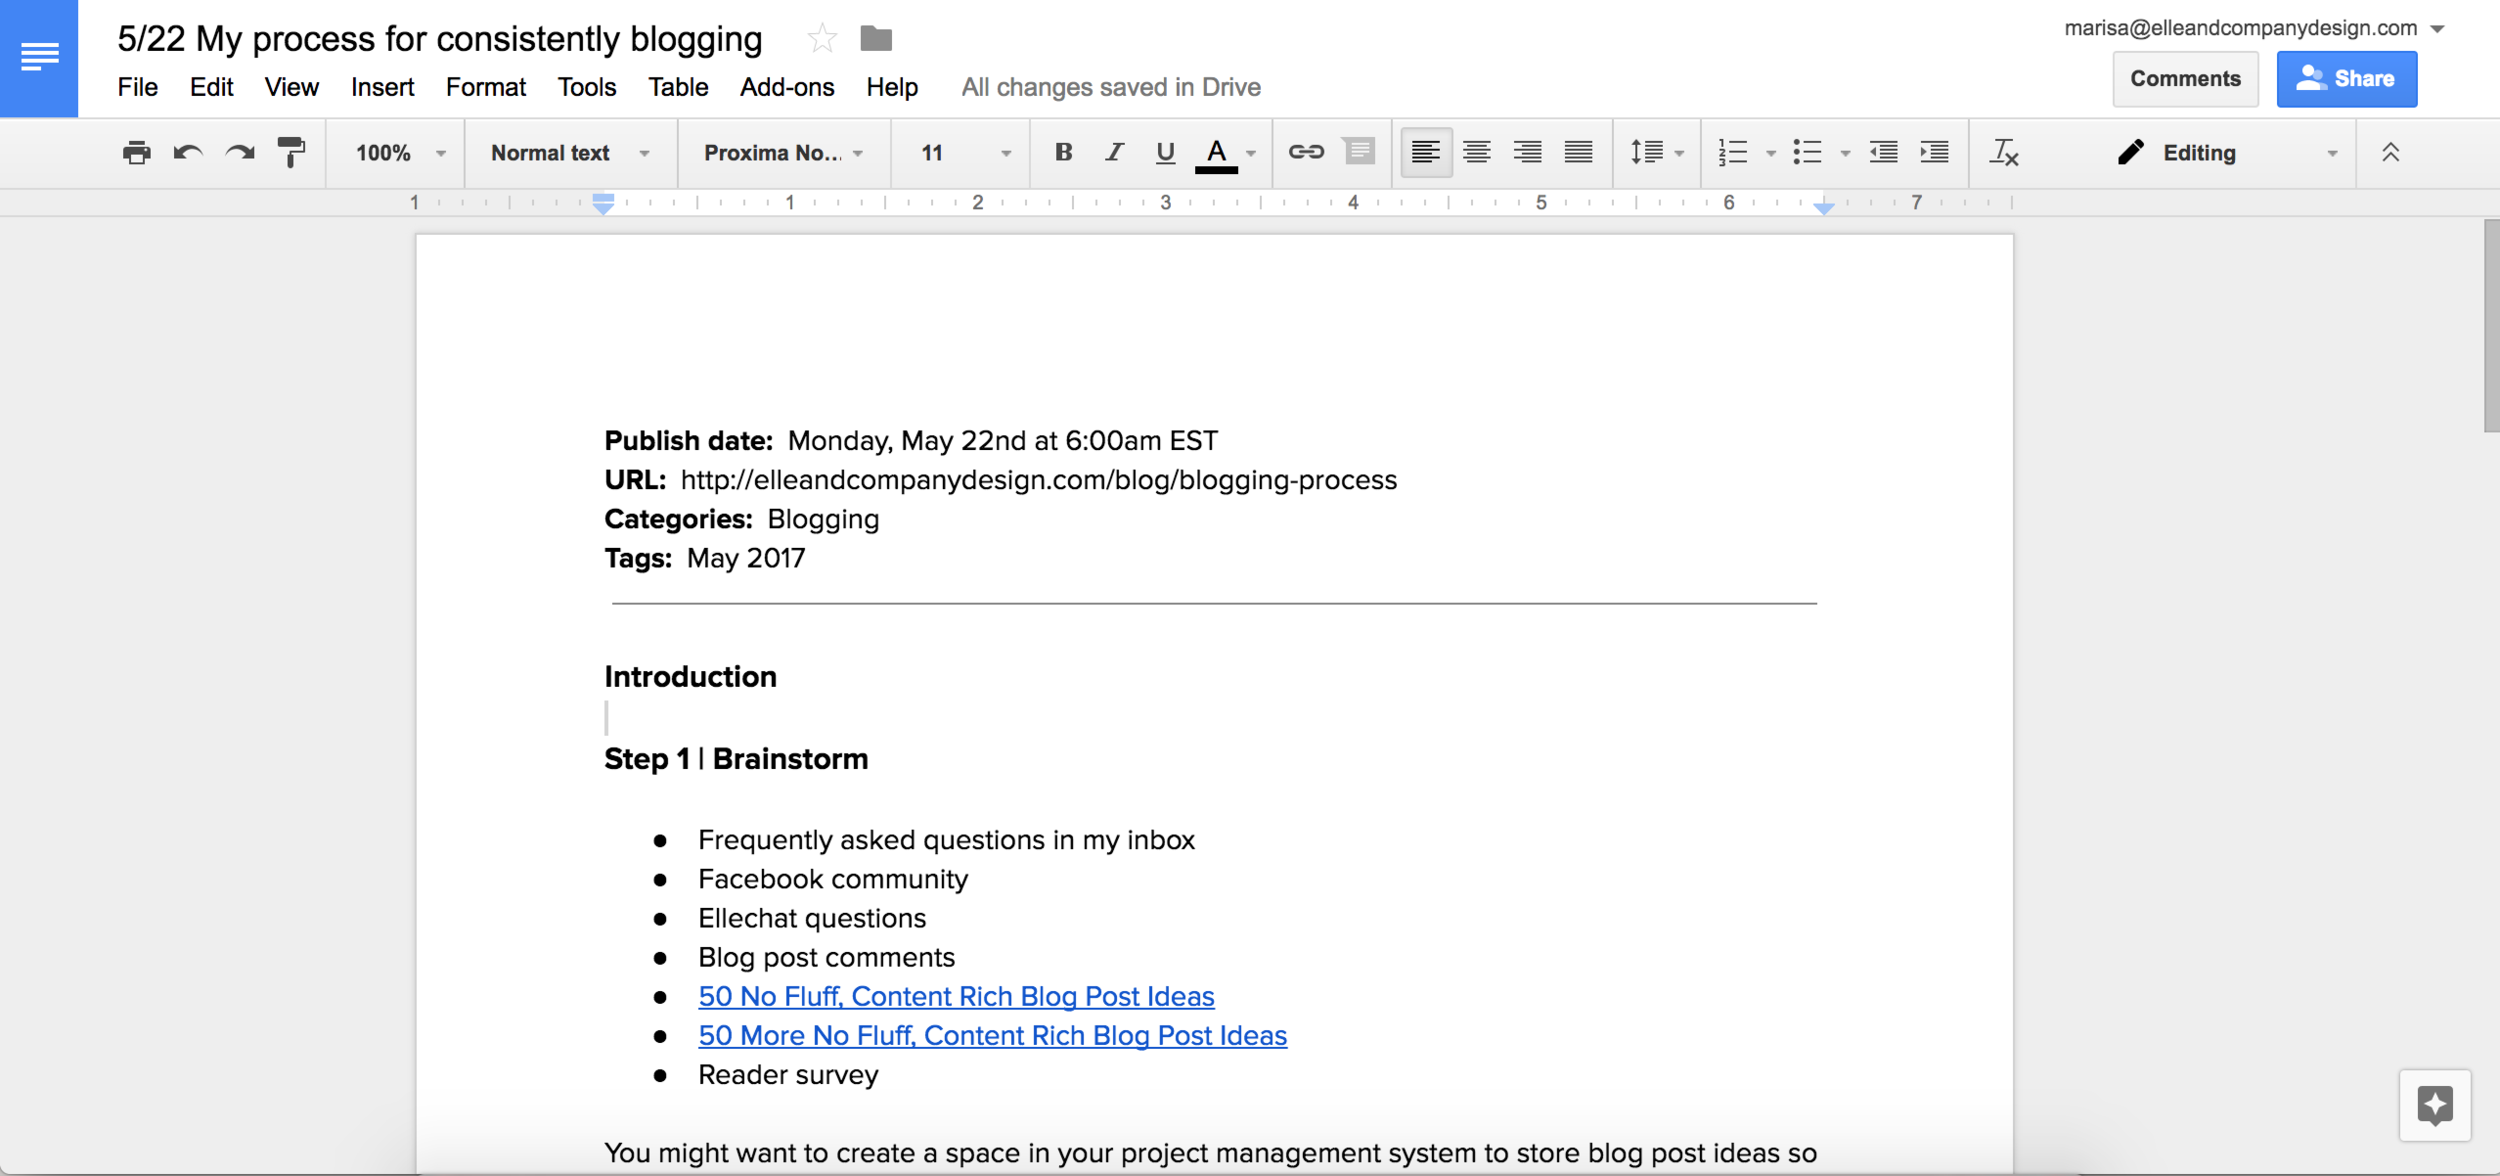
Next I add the subtasks, add due dates to the subtasks, and assign the subtask to someone on my team. Lastly, a blog post template Google Doc is attached to the blog post task.

Quick tip: One of the keys to consistently blogging is creating an editorial calendar. Consider how many times you’re going to post each week and stick to it. Not only does this provide a little accountability and routine on your end, but it sets an expectation for your readers of when they can come back and see new content. The more you can post, the better. But be realistic - it’s better to start out slow and add on than it is to start out with a bang and lose steam.
Step 3 | Outline each post
One of my biggest struggles when it comes to consistently blogging is the overwhelming feeling I have at the thought of having to write an entire blog post in one sitting. You might be able to relate.
If so, this simple tweak to my blogging workflow has helped me tremendously.
My first subtask for any blog post is to outline the post first. I spend about 20-30 minutes outlining the post and creating bulleted lists of things I want to mention. This helps me get my ideas and direction for the post “on paper”.
After creating the outline, I step away from this task and leave the full on writing of the blog post for another day. Now I’m able to go back to Asana and check something off. Progress!
Quick tip: Outlining blog posts is a great task to batch. Because each outline tasks me about 20 minutes, I can easily crank out a week’s worth of blog post outlines in an hour each week.
Step 4 | Write
After about a day or so, I revisit each outline to flesh it out and finish writing. Since the outline helped get me started in the right direction, writing the blog post takes me an hour or two.
If I included any images in the blog post, I upload the images to the appropriate Asana task so my assistant has all the images when she goes to set it up in Squarespace (unfortunately Google Drive doesn’t allow you to copy and paste images to another program or save them onto your desktop).
At this point, I’ll also add in any additional code (for things like content upgrades) or any other elements needed to finish out the blog post, and make any internal notes needed right in the post. Since I work with a team, I usually highlight these internal notes in bright yellow so my assistant can easily see them.

Quick tip: Google Drive is a lifesaver for organizing and keeping up with blog posts. While Pages and Word are helpful programs, they don’t automatically save your work and they can’t be accessed on your tablet or mobile devices unless you email them to yourself. If you have a team, you can easily share Google Docs with assistants and collaborators, too.
Step 5 | Edit
Next, one of my assistants will go in and edit the post so we have multiple eyes on the content before we hit publish (because goodness knows that after staring at a post for a couple hours, I’m bound to make mistakes).
If this isn’t an option for you, you might consider adding time to your blog post workflow to allow for another day between when you write and when you edit the post, just to make sure you have fresh eyes when editing.
Before I had assistants, I would also go back through my post and read it out loud. This was super helpful for catching errors and identifying sentences that didn’t flow well and could be worded differently.
Once the post has been edited, it’s time to set it up and schedule in Squarespace.
Step 6 | Set up and schedule in Squarespace
Now it’s time to put everything together and set up and schedule the blog post in Squarespace.
This is where having the Google Doc and pictures attached to the same task in Asana is helpful. My assistant just needs to go to the blog post task in our Content Queue, click on the task and have everything she needs to set up the post all in one place.
Once the post has been set up, it’s time to schedule it. We typically schedule our posts to go live at 6:00 AM EST so they’re up first thing in the morning, when people are more likely to check blogs while drinking their morning coffee.

Quick tip: Something else that’s helpful to keep in mind for setting up blog posts in Squarespace from a Google Doc is to copy the text from the Google Doc and paste it as plain text into Squarespace by using SHIFT + Command + v. This is to ensure that the styling from the Google Doc does not carry over to Squarespace and make your blog text look wonky. The keyboard shortcut makes setting up blog posts go by much quicker!
Step 7 | Promote on social media
Your post is up! Now it’s time to promote it and drive traffic back to your site.
I like to include a subtask for this step in the process under each individual blog post because it’s easy to overlook (especially when you’ve written and scheduled blog posts far in advance).
When it comes to promoting a blog post, we always post about it on Twitter and Facebook and pin it to the appropriate Pinterest boards.

Quick tip: Your blog and mailing list go hand-in-hand. Driving traffic to your blog and website helps you grow your list, and your list can help drive traffic back to your blog and website. Every so often, consider sending out an email about a new post with a link back to your blog. You might just copy and paste the intro with a call-to-action to read more.
Step 8 | Add 3 promotional posts to MeetEdgar
Lastly, one of the final blog posts subtasks is “Add 3 posts to MeetEdgar”. I don’t like to combine this task with the “Promote” task because it’s too easy to get lazy, put it off until later, and never get around to it.
By adding social media posts to MeetEdgar, you ensure that your new blog post will be continually promoted in the future.
When you add new posts to a category in MeetEdgar, it immediately works that into your content queue and the posts you just added become the next posts that will be pushed out on your social media platforms.
This is particularly helpful on the day a blog post goes live because not only did you schedule posts in MeetEdgar to continually recycle, but the posts will show up on your social media platforms that day while the blog post is still new!

Quick tip: Buffer is another great option for scheduling social media posts (and it’s a little less pricey than MeetEdgar). Check out this post to learn how to set it up.
Everyone’s blog process looks a little bit different and it takes time to figure out what works best for you.
My hope is that this behind-the-scenes look at my system helps make blogging a little less stressful for you and as a result, a lot more consistent!
What does your blog process look like? Is there anything you do differently?